

Hello!
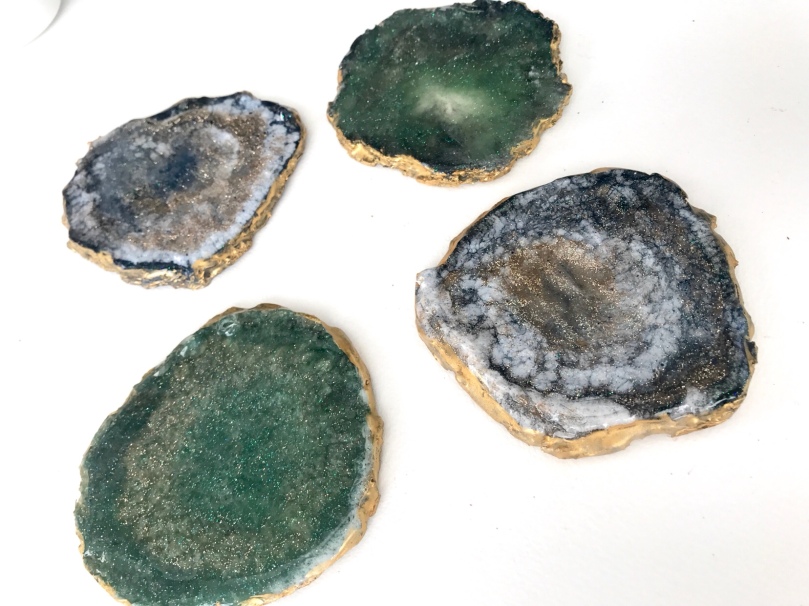
I have received a ton of requests asking how I make my geode coasters, so today I am going to share my process on how I made my own silicone molds to make these beautiful geode coasters below.


Let’s start off with the supplies you’ll need:
Supplies: For Molds
- Silicone Caulk (I got mine from Home Depot)
- Caulk gun
- Plastic wrap / Cling Film
- A piece of cardboard
- Parchment paper
- Popsicle stick / something to spread the silicone
- Rubber gloves
- Well ventilated area
Additional Supplies: For Coasters
- Resin (I use Art Resin)
- Glitter (optional)
- Acrylic Paints (your choice of color)
- Culinary Torch
If you have never used Resin before, read up on my previous post for some tips!
Step 1: Prep your board, Plan your shape
You will want to make sure you have a sturdy, flat surface to work on. I used a piece of thick cardboard and then wrapped it with plastic wrap. At this point you’ll likely have an idea of what shape you want your molds to be. I wanted to make something similar to a geode (slightly round but with natural bumps and ridges) and so I drafted some shapes out on a piece of parchment paper. Then I placed this under my plastic wrap so that I could use it as an outline for my silicone molds.
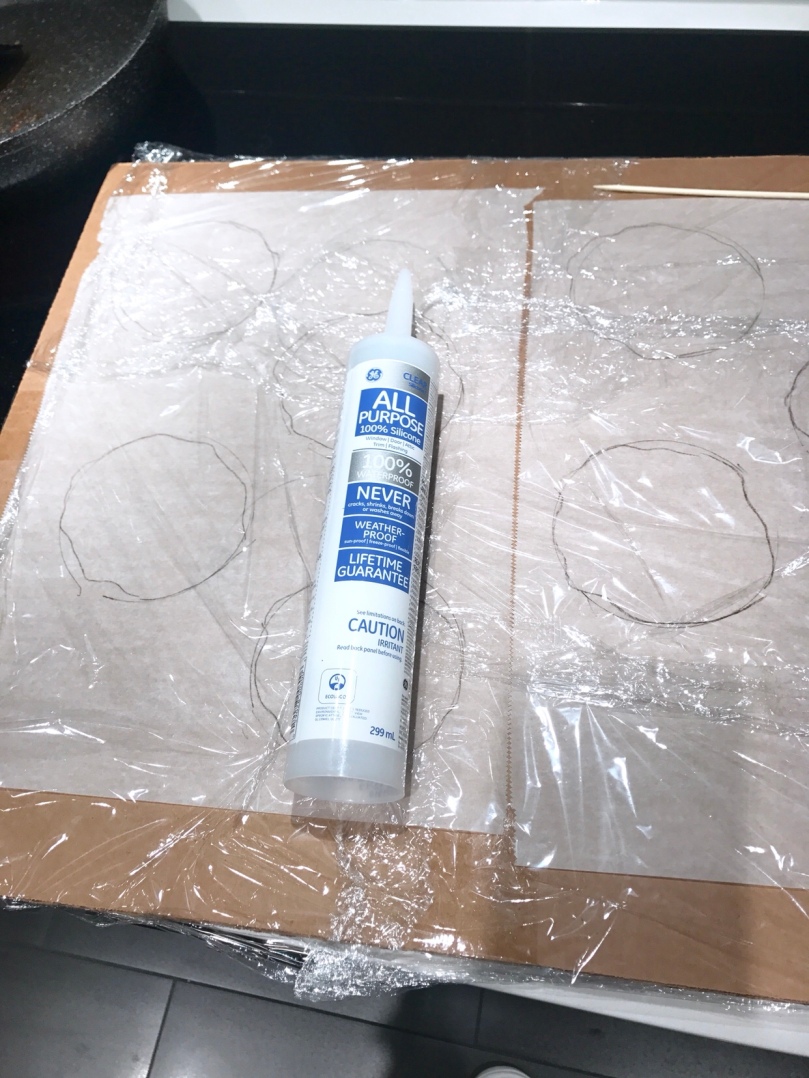
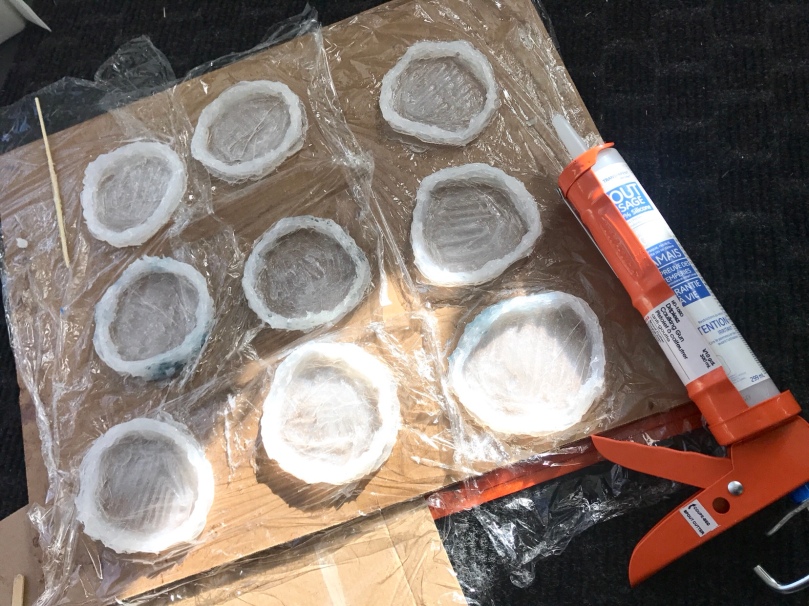
Step 2: Make your molds
Place your tube of silicone caulk into the caulk gun and you’re ready to start making your molds! Guiding the gun, trace over your outlines until you are happy with the shape. Depending on how thick of a cut you made on the tip of the caulk, you may want to go over this shape a few times to make the mold a little thicker and stronger.
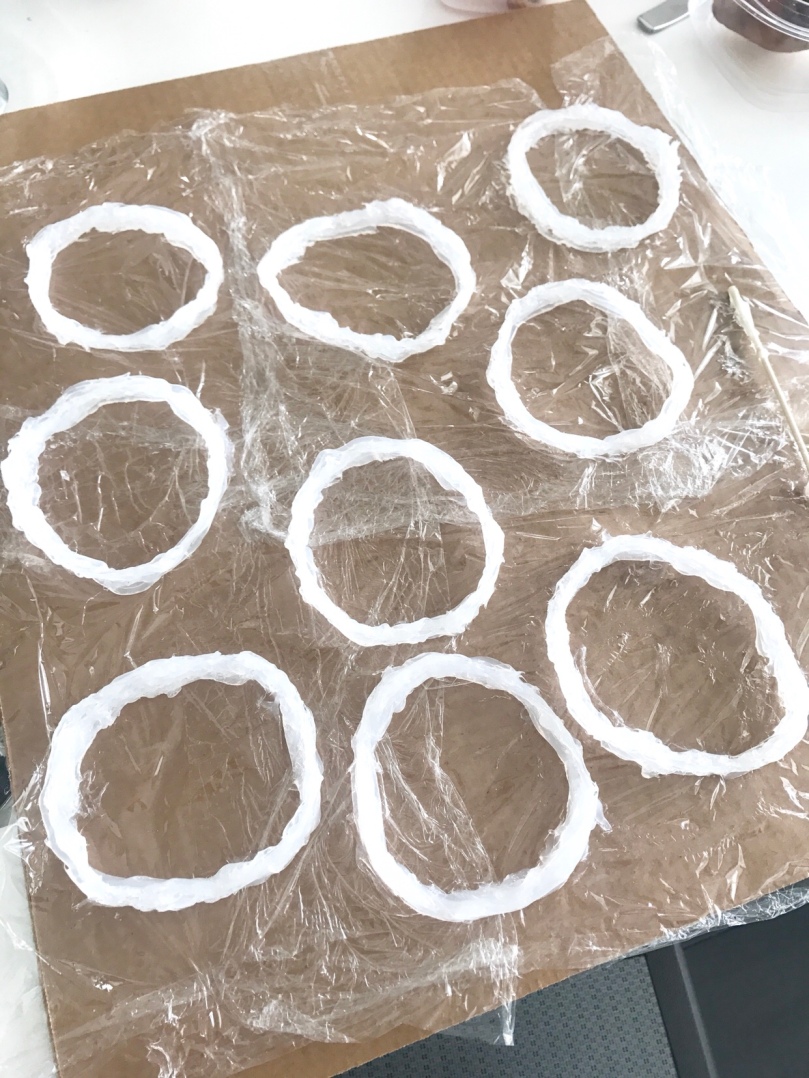
Once you are happy with your molds, leave them in a well ventilated area to dry (trust me, the silicone has a strong vinegar smell!). I left mine dry overnight before peeling them off.
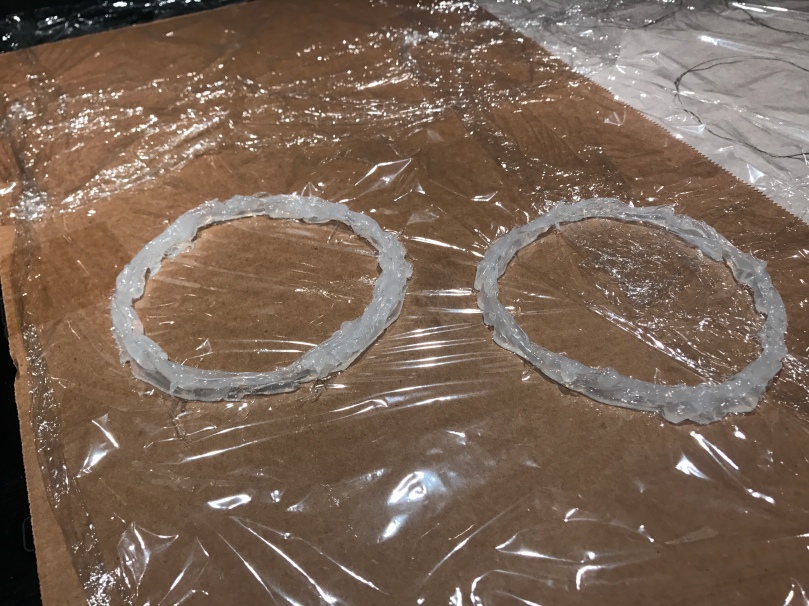
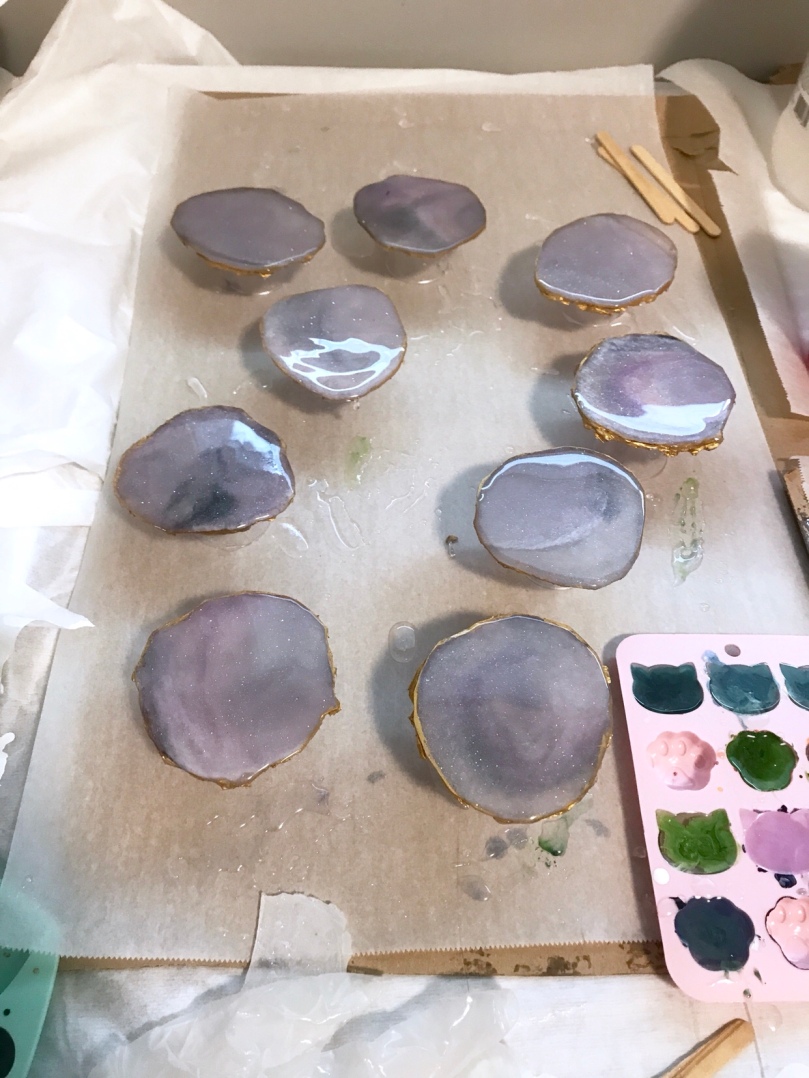
Here you’ll see I made about 9 silicone ring molds with the tube of silicone caulk.
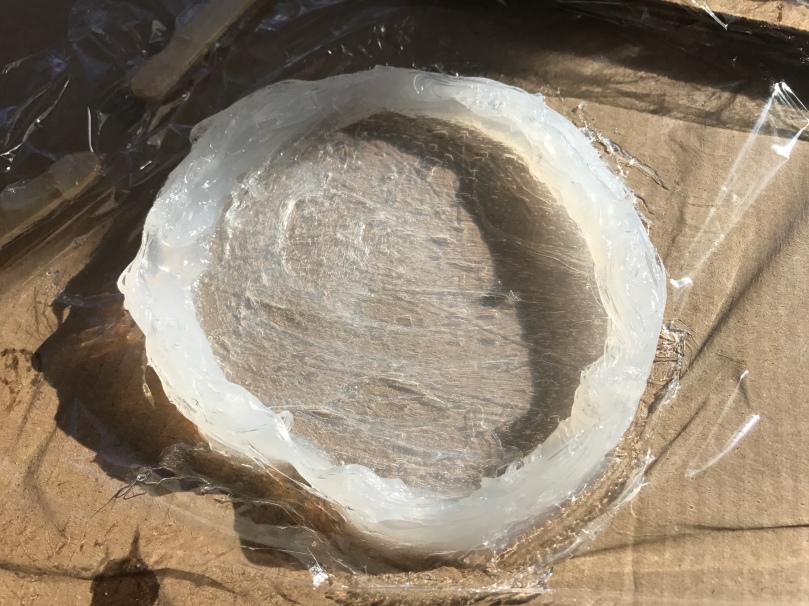
Step 3: (optional) Add a base
Now here’s an option you can try. When I first made my ring molds, I added a thin base to each of them so that they were portable and could hold the resin without any leaks. To do this, I squeezed out a small mound of silicone and then spread it thin with a popsicle stick. However, don’t be like me and make sure to be careful you fully smooth out the base or else you will end up with bumps and ridges like I did.
Note: I ended up cutting out all my bases from my molds because they were driving me nuts. I may have to try this again next time and find a way to smooth out the silicone so I get a flat even surface. If anyone knows any tips, please do let me know!
Below are some examples of what my coasters looked like using the base. Note that this is even after I sanded it down and applied a second coat of resin. You can still see the uneven surface and ridges.
Here’s my molds all nice and pretty. Oh how I wished those bases worked out!
Step 4: Pour your resin
After the silicone molds are dry, you are ready to test them out! Pour your resin into the molds and let it cure for at least 8-10 hours (depending on how thick you poured). Then carefully, peel back the silicone and you should be left with your beautiful coasters!
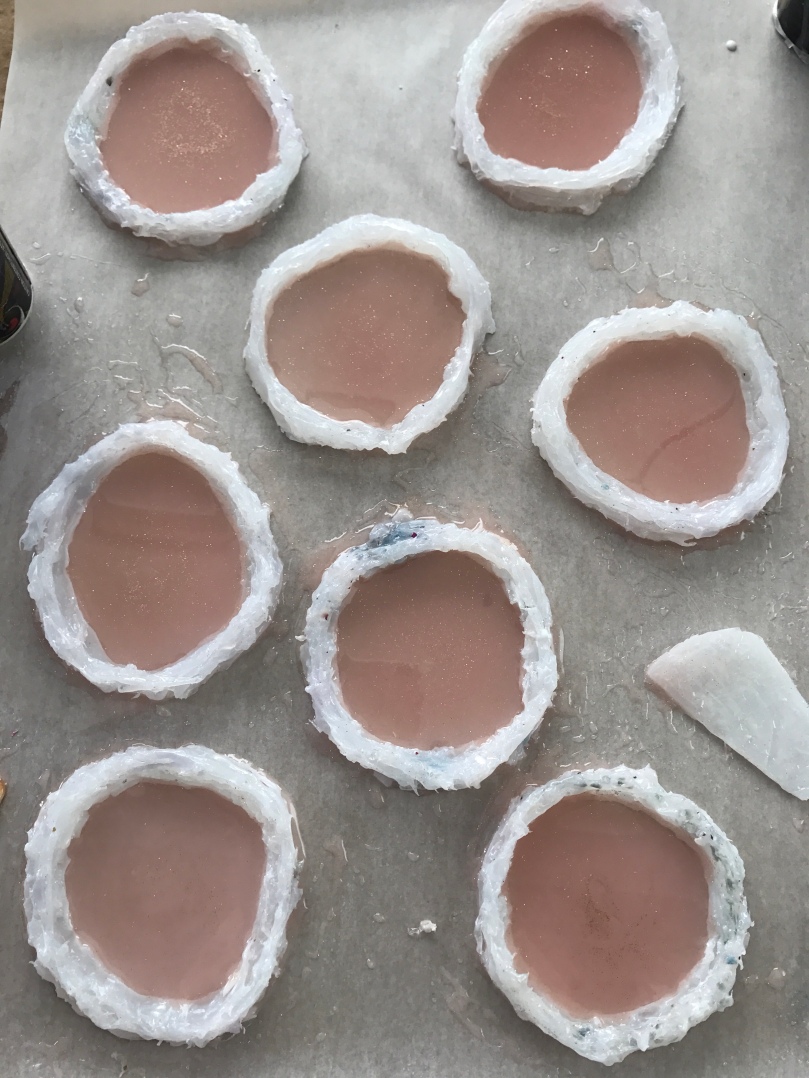
Since I cut out the base of my molds, you’ll notice I have some slight leaking. I just wait for about an hour for the resin to thicken a bit and then I scoop up the resin and either put it back inside the molds, or use it to make keychains.
TIP: check back in an hour or so and run your torch over each coaster again. As the resin settles, more bubbles will rise to the surface so you’ll want to pop them again!
Step 5: (optional) Add a clear coat
Since I am using parchment paper as my base under the molds, the backs of my coasters generally come out with a matte finish. Because I want the coasters to be nice and shiny, I prop them up on little plastic shot glasses and pour another coat of resin.
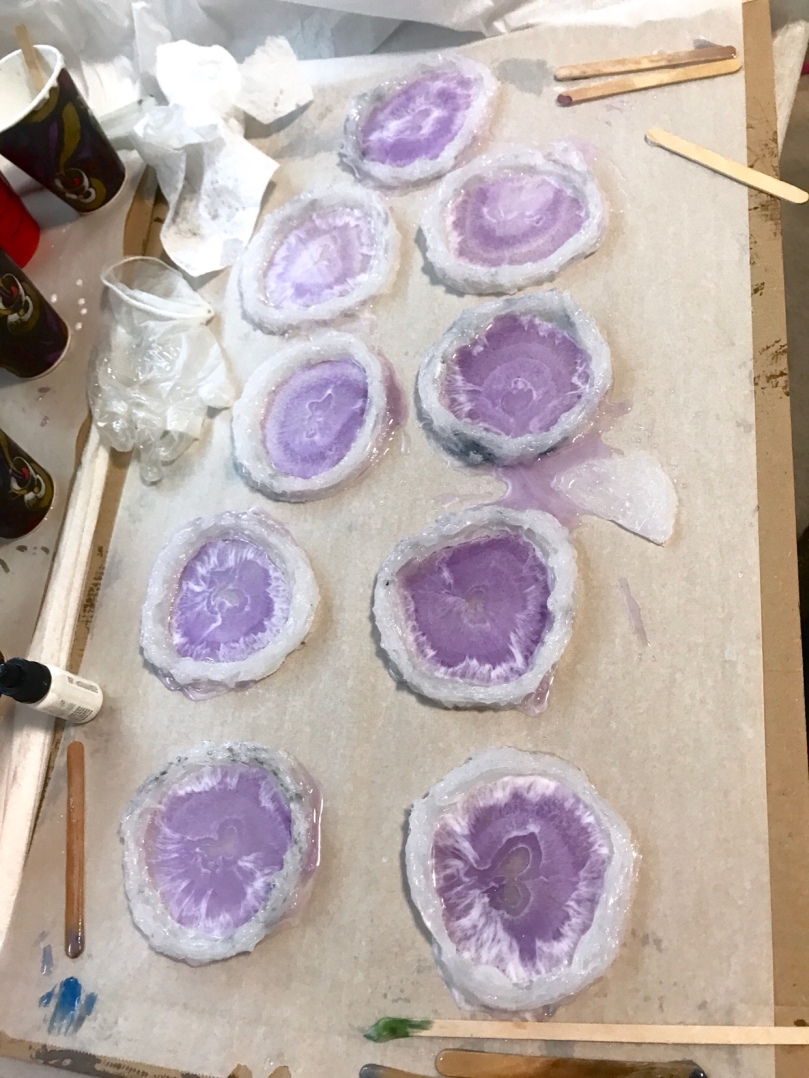
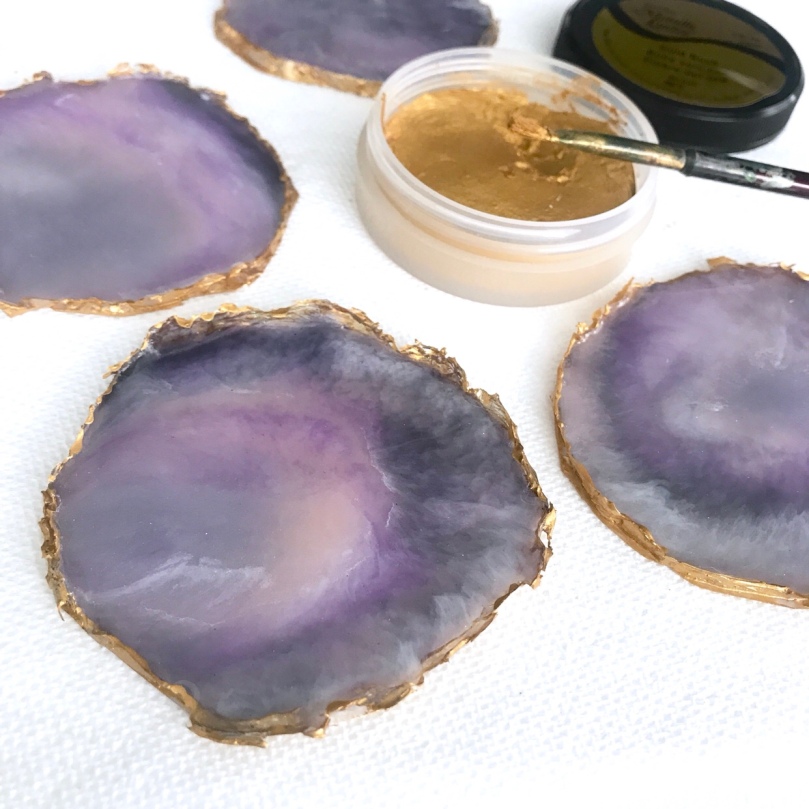
Step 6: (optional) Add a gold trim
Once everything is cured, I paint on a gold trim to give the coasters a more finished and polished look. I use several layers of Deco Art’s metallic lustre in Gold Rush to achieve the look I want.
and Ta-Da! You now have beautiful, romantic, geode inspired resin coasters!
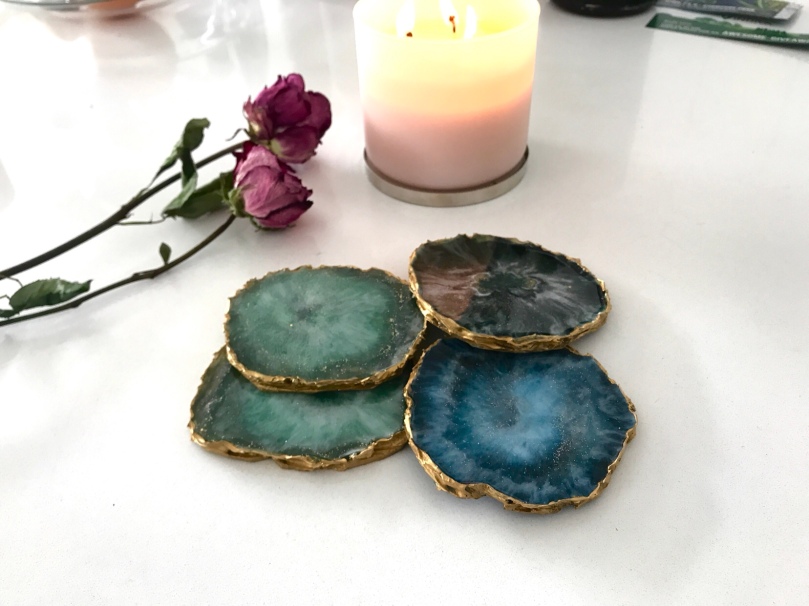
I hope this tutorial has helped those who were always wondering how to make your own shapes and sizes. I haven’t gotten around to playing around with different shapes and sizes but I’m sure it will be a similar process. If you do give this a try, please share your results with me! Follow me on Instagram: Paintingsbyagnes and share your pics with me! I would love to see what you come up with!
❤ Agnes


Hello,
To smooth out the silicone bases, I would use a little spreader and make it first on a smooth surface with the cling wrap. Then once dry I would flip it over so the flat side is up and then make the edges. If it’s not completely flat on the bottom you could add dabs of silicon here and there until it sits flat.
LikeLiked by 1 person
I bought a couple of inexpensive silicone baking mats from AliExpress ( they were £2.16 for a pair ) and I find they give me a really good shiny flat surface. I put them onto a piece of foam core, then make my rings on them and hold them in place with a sculpting clay that never dries (and resists resin – bonus). Everything comes out nice and shiny.
LikeLike
I would like to use resign to decorate a mirror in the corners, using shells I have found. Do you think if I put silicone on the mirror and let it dry it would keep the resign just in the corners and when the resign dries I could remove the silicone?
LikeLike
Hi ,
I’m Caryann and I’m a life long artest / all around crafter for about 30 years +.
I was reading your form and you asked a question on how to make the base smooth. I have the perfect solution for you. Make your cilicone in a pouring consistency. This way you can make almost any mould you want at an afordable price. It takes 4 hrs to cure and about 3 days for full cure and evaporated solvents , so be sure to do any preparations dsys in advance of project.
The recipe I use :
Use in well ventilated area. Use safty glasses and gloves!
1 part 100% clear silicone calk
1 1/3 part turpentine
6 Tablespoons corn starch (assuming you use a whole tube of silicone calk)
4 Tablespoons of Acrylic Art paint ( any color or cheap brand will do ,I get the craft paint from walmart)
In container mix silicone and turpentine together . Be patient in stiring and try not to get bubbles in silicone. After substances are blended add your cornstarch and acrylic craft paint . Stir till compleatly blended . Pour into your mold. Let set . Some times there is about 25% shrinking on moulds but I dont think this should happen with your geoed mould . As long as you pour into fresh rings( stll wet not set)
I hope this helps
LikeLike
How did you color the epoxy
LikeLike
I add a pea sized drop of acrylic paint and mix! Sometimes I also add some glitter but you can use any paint, pigments or ink!
LikeLike
can you show how you mixed the colors in the geodes.. what did u use to make the white lace effect? thanks
LikeLike
I have lots of process videos on my Instagram @paintingsbyagnes if you would like to watch how I mix my colors. The white is resin mixed with some white acrylic paint and then I use a torch to create the lacing effect. There is also a video on my Instagram showing the lacing! Hope they help ☺️
LikeLike
Exactly what I was going to say, only I would not turn them over. Just let them dry, then fill them in to the top of the outer edges.
LikeLike
I haven’t tried this, but could you use a thin piece of board for the base?
LikeLike
Hey! You can use a board instead of the cardboard but make sure it is a material that the silicone will not stick to! You can always do a test dot on the board to see so that you don’t waste your efforts. Good luck and have fun!
LikeLike
Hello there, what did you do to make the bottoms have a shiny finish instead of the matte finish? That was a bit confusing to me. Thank you!
LikeLike
Hi there! Once the coasters were fully cured, I flipped them upside down and added another coat of resin to the bottom to give it a shiny finish.
LikeLike
My husband works with silicone all day, on showers and such. He says the only way they get it to lay smooth is to actually spit on his finger and run it through the silicone it is the only thing that won’t stick to when you are trying to move it around or smooth it.
LikeLike
Interesting!! Thanks so much for the tip!!
LikeLike
Hi again, I was just wanting to pass something else along. I work with cement for crafts and such. When I want a gloss look on the bottom I use a piece of glass or plexiglass. Glass does work best. It doesn’t absorb so everything stays in place to harden. I always have a high gloss on the bottom.
LikeLike
Thank you so much! Good to know for the future.. maybe I need to invest in a large piece of glass hehe
LikeLike
You could use a plastic edge spreader, like for large epoxy, fiber glass resin, or car bondo. Make a dab of silicon, and then spread it out for the bottom. Follow with the side build up. That may give you a smoother mold bottom.
LikeLike
Thanks so much for the tip and idea! Will definitely need to test it out.
LikeLike
I am using alcohol ink on 4 1/4 inch square tiles to make a back splash . I want to finish with resin, but do not want the resin to drip over the edge. How can I make a silicon mold to stop the resin from dripping over?
LikeLike
Hi! So sorry for the late reply. You may have already figured out a solution but if not, you can definitely try to make a mold but with higher edges so that it keeps the resin in! I would recommend getting the mold making sets if you’re looking for the easiest solution. They come with a mix to make a mold and then you can press in your square tile deeper into the mold to get the raised sides. You could also tape the sides of each tile to prevent the drips but this would take more effort and time to do a large number of tiles. Or you can try to use less resin on top so that there will be minimal amounts dripping over the edges, so just applying a very thin layer. Good luck!
LikeLike
Thanks for responding with three great ideas/solutions!
LikeLike
Thank you for this post, I am new to Resin, and a bit scared and thus hesitent.
Really want to make some Resin sun catchers for my little grandbaby girls. Can I drill a hole into the finisher Resin piece to hang my suncatcher? Kerrie
LikeLike
I did and used fishing line to hang. Be sure to hang out of reach.
For windows, I used a small square of double sided tape I found at Hobby Lobby.
LikeLike
Thanks for your article, it’s really useful ! I wanna try resin for the first time and this gives me some ideas ! ❤
LikeLike
Thanks so much for reading! Hope you have fun and make some amazing art!
LikeLike
When you are doing the gold edges what product are you using as i use liquid gold leaf but yours look so nice and chunky thankyou
LikeLike
Hi! I use Decoart’s metallic lustre in gold rush.
LikeLike
Thankyou for getting back to me ill try that one
LikeLike
Hi, how long did you let the silicone mould set for before you poured the resin in?
LikeLike
I usually let mine set overnight! When it is set it’ll feel rubbery and can hold water. You can always test out your molds by pouring in water instead of resin first. Good luck!
LikeLike